Roaming Setup
- A7RIII Webcam via AV.io 4k
- A7RIII Webcam via CAM LINK 4K
- A7RIII Webcam via Sony Imaging Edge software
- AV Setup
- Lecture Capture Setup
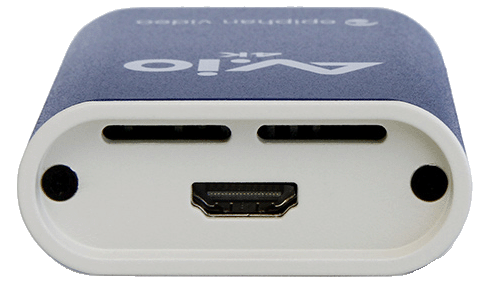
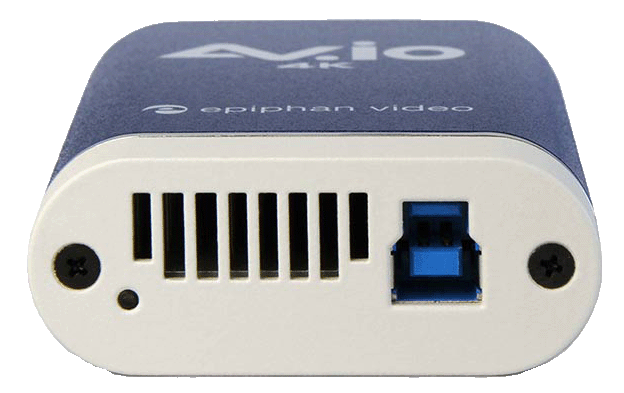
A7RIII Webcam via AV.io 4k

** This capture method will capture audio from the A7RIII (Built-in mic on camera, or another mic plugged into the camera)
** This capture method does not require any plugins or additional software (besides Zoom or other conferencing software)
Items needed
- AV.io 4k
- USB 3.0 Cable (one end needs to be USB 3.0 Type B, other end can be the more common Type A, or USB-C)
- An HDMI Cable - Full size to HDMI-Micro (on the A7RIII)
1) Connect the AV.io 4k to your computer by plugging in the USB on the AV.io, and plugging the other end into your computer
2) Connect your HDMI cable to the AV.io
3) Connect the other end of the HDMI cable to the Sony A7RIII Micro HDMI port (on the left side of the camera under the top back flap)
4) On A7RIII - Turn the wheel on top of camera to Movie Mode (film strip icon) *You may still get an image in other modes, but they won't fill up the widescreen view, and it won't pass audio
5) Turn A7RIII on if not already on
6) Open Zoom - Either in preferences > video, (or in a launched meeting under the video icon) select AV.io 4K *If using a mic connected to the camera, also select AV.io 4K Audio for the Microphone input
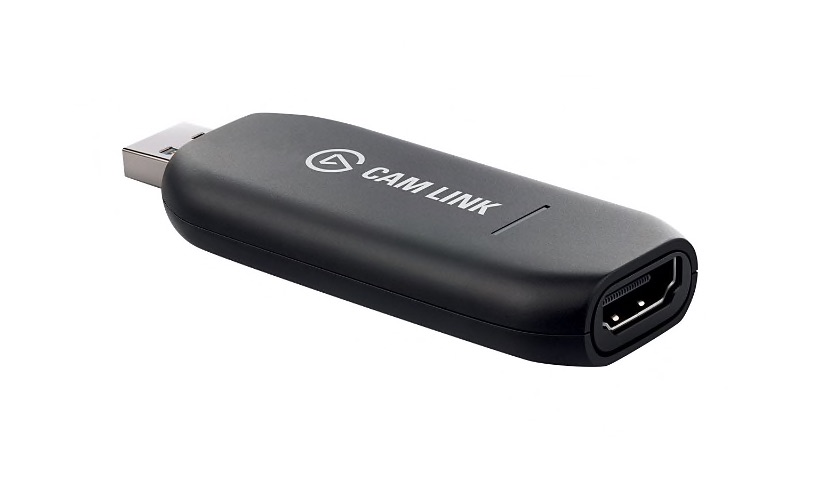
A7RIII Webcam via CAM LINK 4K
** This capture method will capture audio from the A7RIII (Built-in mic on camera, or another mic plugged into the camera)
** This capture method does not require any plugins or additional software (besides Zoom or other conferencing/recording software)
Items needed
- Cam Link 4k
- Cam link has a built-in USB-A plug (traditional USB - see image above), you may need an adapter to USB-C for your computer (i.e. any Mac Laptop in last few years)
- An HDMI Cable - Full size to HDMI-Micro (on the A7RIII)
1) Connect the Cam Link 4k to your computer by plugging in the USB end into your computer (may need an adapter)
2) Connect your HDMI cable to the Cam Link
3) Connect the other end of the HDMI cable to the Sony A7RIII Micro HDMI port (on the left side of the camera under the top back flap)
4) On A7RIII - Turn the wheel on top of camera to Movie Mode (film strip icon) - And turn on Camera *You may still get an image in other modes, but they won't fill up the widescreen view, and it won't pass audio
5) Open Zoom - Either in preferences > video, (or in a launched meeting under the video icon) select Cam Link 4K *If using a mic connected to the camera, also select Cam Link 4K for the Microphone input
**If you switch modes on A7RIII - via top ring, or in menus while connected in a meeting, Zoom may turn off your video, just click the start video icon again to restart it.
A7RIII Webcam via Sony Imaging Edge software
Items needed:
- Sony A7RIII Camera
- USB-C cable
- Computer
- Optional but very likely needed - a mini or full size tripod capable of holding the A7RIII
Download and install newest version of Sony Imaging Edge Webcam -
http://support.d-imaging.sony.co.jp/app/webcam/en/download/
If using a SSCERT Media machine, this should already be present.
*If installing, be sure to restart your computer after you've installed the software.
Compatible with
- Microsoft® Windows® 10 (64-bit) operating system, Windows 11
PC with Intel or AMD processor (The software will not run on PCs based on ARM processors) - Apple® macOS® 10.14, macOS 10.15, macOS 11, macOS 12
Audio will not go through the camera, you will have to use the built-in mic on your computer, or an external microphone connected to your computer Please note this can sometimes lead to slight audio sync issues. Frame rates may also not be perfect, image can seem a little slow or behind.
On Camera:
6) On the circular dial on top of the camera, set it to Movie Mode (film strip icon)
7) On Computer - Before connecting the camera to your computer make sure "Imaging Edge Desktop Remote" software is *Not running
8) With camera on, connect USB-C cable to camera on left side (if facing camera screen) you may have to open flaps to reveal the port, USB-C port is behind bottom flap.
9) Connect the other end of the cable to your computer
10) Launch Zoom - Go to Preferences/Settings > Video and under camera select "Sony Camera(Imaging Edge)" - You should see an icon for Imaging Edge Webcam come up on the screen briefly, and then the image from your camera (make sure your lens cap is off)
11) If you see the image, you should be ready to start your meeting/recording! Be sure to select your audio source as well, as no audio will come through the camera.
AV Setup
Major Components
- MacBook Pro
- Rally Camera
- C920 Camera
- Zoom H6 Audio Interface
- Shure Audio Amp
MacBook Pro Notes
- USB to Ethernet - connect to Zoom and C920
- USB C - Rally Camera
- USB C - Ethernet
Zoom H6 Notes
- USB to Ethernet
- Headphone out - connect to Shure Audio Amp
Shure Audio Amp Connections
- Power to
Lecture Capture Setup
Zoom on personal computer
1) Open Zoom
2) Click New Meeting (if you are recording to upload later), or join or start a meeting if you will be recording an active class.
3) If it asks to "Join with Computer audio" click that.
4) You should now see your video feed from your computer's camera
5) To begin recording, Either click the "Record" button (and select to this computer or to the cloud), or if your window is small you may have to click on the three dots "More" (and select "Record to this computer" or "Record to the Cloud".
If you are using an external Camera (including builtin ceiling/wall mount cameras) make sure that you have it connected, and selected.
1) To select an external video source, (make sure it is physically connected) click the small arrow to the right of the camera icon and select your camera
2) To select an external audio source, click the small arrow to the right of the microphone icon and select your audio device (both Microphone (input), and Speaker (output)).
Specialized setups will be added below: